
Scroll Rotation Values Script
sgdk_scroll_rotate.py is a script that per-calculates horizontal and vertical scrolling values to simulate full screen rotation with SGDK’s scrolling functions. It calculates scrolling offsets for a range of rotation values specified by the user. The values are stored in s16 arrays for use with VDP_setHorizontalScrollLine() and VDP_setVerticalScrollTile().
Installation / Dependencies
The script was written for Python3 and requires NumPy , Jinja, and PILLOW.
I’m using Windows Subsystem for Linux (WSL) and Ubuntu 22.02 on my development machines, but I imagine most people will be using Windows.
I’m going to keep on using Linux, but I have installed the windows versions to test the script.
- Get Python3. I used the Microsoft Store version on Windows 11.
- Install the dependencies. I opened a command line window and typed:
pip3 install numpy
pip3 install jinja2
pip3 install pillow- Test the script by running
python3 sgdk_scroll_rotate.pyIf all went well, you should see output like this: 
The rotation.h file has s16 arrays _hScroll[] and _vScroll[]. _hScroll[] contains horizontal scrolling values and _vScroll[] has vertical scrolling values that can be used to rotate the Sega Genesis’s scroll planes.
Background Information
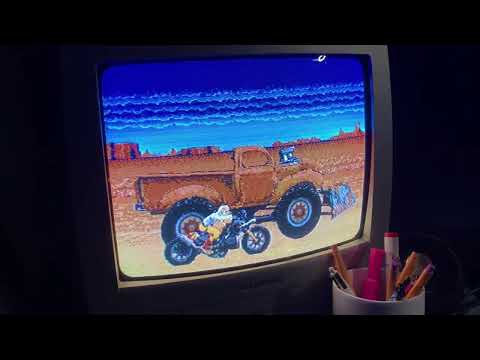
Simulating full screen rotation by scrolling parts of a background plane horizontally and vertically is not my idea. The effect is from the Sega Genesis game “Bubsy”. Coding Secrets wrote the code and describes the technique in this video:  It’s worth watching. If you’re interested in Sega Genesis programming at all, you should definitely like and subscribe to the channel.
Unfortunately, when I tried to follow the source link, I got a 404 page from the server. So I decided to try to make my own version.
My code is based on 2D rotation matrices.
If you have a 2D point p (located at x and y) and rotate it around the origin by θ radians, you can determine its new location p' at x' and y' with just two equations:
x' = x cos θ - y sin θand
y' = x sin θ + y cos θ
The main thing to note is the new x' and y' values are always based on some independent combination of the previous x and y values scaled by sin() or cos(). The independence of x and y lets us easily separate out the horizontal and vertical components of the rotation.
The Horizontal / X Component
Suppose we have a point q at x=0 and y=1. If we rotate q around the origin (0, 0) by θ radians, the new x' position of q' is
x' = x cos θ - y sinθSubstituting x=0 and y=1 gives us:
x' = 0 cos θ - 1 sinθWhich simplifies to:
x' = - 1 sinθThe horizontal (x) component of q' is entirely determined by the y portion of the equation.
 More generally, any value
 a along the Y-axis would have a x' component equal to the negative of the y position multiplied by a constant sin θ
x' = -a sin θ
x' = -a sin θ can be applied to each row of a Sega Genesis screen to estimate the horizontal portion of the rotation. You just need the distance of the row from your center of rotation and the value of sin θ. My first attempt looked something like like this.
     for( int row = START_ROW_A; row < START_ROW_A + ROWS_A; ++row ){
        fix32 shift = fix32Mul(FIX32( (row - centerY) ), sinFix32(angle));
        hScrollA[row] = fix32ToInt( shift );
     }
Note that:
- I’m using
centerYas the Y component of the origin.
-aisrow-centerY.rowis the current row we want to shift. SubtractingcenterYfromrowgives us the row`s vertical distance from the origin in pixels.
- The Genesis screen coordinate system is NOT the same as the one used in the images above. The origin is the upper left corner of the screen and the positive Y direction is down instead of up. This isn’t a big deal here. I’m just trying to give the illusion of rotation and we can flip the axis either direction by changing the order of the subtraction.
The values stored in hScrollA[row] are used to horizontally scroll each row with SGDK’s VDP_setHorizontalScrollLine() function.
VDP_setHorizontalScrollLine(BG_A, START_ROW_A, hScrollA, ROWS_A, DMA);This skews the image like this: 
Vertical / Y Component
Similarly, if we have a point p at x=1 and y=0, and we rotate p by a +θ the new y' position is:
y' = x sin θ + y cos θSubstituting x=1 and y=0 gives us:
y' = 1 sin θ + 0 cos θWhich simplifies to:
y' = 1 sinθThe vertical (y) component is entirely determined by the x portion of the equation.
 So a value
 a anywhere along the X-axis would have a new y' component equal to the x position multiplied by a constant sin θ

Unfortunately, vertical scrolling on the Sega Genesis is restricted to the entire plane or 16-pixel wide columns. So we can’t apply this to each pixel column of the screen. We have to settle for 16-pixel wide columns.
    for( int col = START_COL_A; col < START_COL_A + COLS_A; ++col ){
        fix32 shift = fix32Mul(FIX32(  16 * (col - 10) ), sinFix32(angle));
        vScrollA[col] = fix32ToInt( shift );
    }
Please note: * I’m using 10 as the X portion of the origin. Subtracting 10 from each column gives us a very rough horizontal distance from the origin. * Columns are 16 pixels wide so I multiply the horizontal distance by 16.
The values stored in vScrollA[row] are used to vertically scroll each 2TILE column with SGDK’s VDP_setVerticalScrollTile() function.
VDP_setVerticalScrollTile(BG_A, START_COL_A, vScrollA, COLS_A, DMA);This skews the image like this: 
The horizontal and vertical scrolling code can be combined into a function like this:
void setAngle( u16 angle, int centerY ) {
    // angle is defined as [0..1024] mapped to [0..2PI] range.
    // negative rotation will be 1024 down to 512
    // each value is ~ 0.35 degrees / 0.0061 radians.

    // horizontal component
     for( int row = START_ROW_A; row < START_ROW_A + ROWS_A; ++row ){
        fix32 shift = fix32Mul(FIX32( (row - centerY) ), sinFix32(angle));
        hScrollA[row] = fix32ToInt( shift ) - 24;
     }

    // vertical component
    for( int col = START_COL_A; col < START_COL_A + COLS_A; ++col ){
        fix32 shift = fix32Mul(FIX32(  16 * (col - 10) ), sinFix32(angle));
        vScrollA[col] = fix32ToInt( shift );
    }
}
Once combined, the horizontal and vertical scrolling gives a fairly convincing rotation effect. 
The complete rotation code is available at GitHub
I don’t know if this is what Coding Secrets used to calculate the scrolling values in Bubsy. Calculating cos() and sin() can expensive (but can be looked up) and may be overkill on the Genesis. This technique doesn’t work well for large rotation angles. I suspect you could skip the sine and cosine calculations and just linearly shift lines and columns by small amounts.
Basic Usage
usage: sgdk_scroll_rotate.py [-h] [-v] [-s ARG] [-e ARG] [-i ARG] [-c ARG] [-C ARG] [-x ARG] [-w ARG] [-r ARG] [-R ARG] [-y ARG] [-o ARG] [-P ARG] [-p ARG] [-b ARG] [-t ARG] [-S ARG]

Generates rotation arrays for SGDK.

options:
  -h, --help            show this help message and exit
  -v, --verbose         Print debug messages
  -s ARG, --start_angle ARG
                        Starting rotation in degrees
  -e ARG, --end_angle ARG
                        End rotation angle in degrees
  -i ARG, --angle_increment ARG
                        Rotation step size
  -c ARG, --column_start ARG
                        First column to rotate (default 0)
  -C ARG, --column_end ARG
                        Last column to rotate (default 19)
  -x ARG, --center_x ARG
                        Which column is the center of rotation
  -w ARG, --image_width ARG
                        Width of image to rotate
  -r ARG, --row_start ARG
                        First row to rotate
  -R ARG, --row_end ARG
                        Last row to rotate
  -y ARG, --center_y ARG
                        Which row is the center of rotation
  -o ARG, --output_filename ARG
                        Output filename
  -P ARG, --prefix ARG  Add a prefix to array names
  -p ARG, --project_directory ARG
                        Create project directory with resource files and simple SGDK code.
  -b ARG, --background_filename ARG
                        Specify background image
  -t ARG, --points_filename ARG
                        Specify CSV file with points to rotate along with bg
  -S ARG, --sprite_filename ARG
                        Specify target sprite image
Examples
Rotate 2 Degrees
The simplest use case is to generate a single set of rotation offsets. This is not really useful. If just want your background image rotated by a fixed angle, you’re better off drawing it that way.
I’m using it here for simplicity
Suppose you want to have a simple image of a green bar.  This image is 320 x 224 pixels. The green bar’s upper left pixel is at
 x = 48 and y = 96. The lower right corner of the green bar is at x = 271 and y = 111.
To make things easier to read I’ll just do rotate the image by 2 degrees. We only have to horizontally scroll the lines with pixels in them. Using a small rotation in this example limits the size of the output files. To limit the computed range to 2 degrees use:
--start_angle 2
--end_angle 2
For this example, I want the center of rotation to be near the center of the bar. This is approximately at (x = 159, y = 103). Recall the Genesis scrolling columns are 16 pixels wide and 159/16 is ~9.9375. I’m going to set the center X value to 9 ( arrays indices start with 0 in C)
--center_x  9
--center_y 103
By default, my script will generate offsets for all 223 rows of the genesis screen. Calculating offsets for every row is be pretty wasteful for this image. We can limit the number of rows with
--row_start 93
--row_end 113
python3 sgdk_scroll_rotate.py --start_angle 2 --end_angle 2 --center_x 9 --center_y 103 --row_start 93 --row_end 113The output will look something like:
C:\Dev\Rotate> python3 sgdk_scroll_rotate.py --start_angle 2 --end_angle 2 --center_x  9  --center_y 103   --row_start 93 --row_end 113
INFO: Parameters
INFO: Start angle: 2.000000 Stop angle: 2.000000 Step size: 1.000000
INFO: Columns to rotate: 20 Center column: 9
INFO: Rows to rotate: 21 Center row: 103
#define ROWS_A 21
#define START_ROW_A 93
#define END_ROW_A 113
#define COLS_A 20
#define START_COL_A 0
#define END_COL_A 19
The output tells you what parameters were used.
The script also generates a file called rotation.h. It should look something like this:
#ifndef _ROTATION_H_
#define _ROTATION_H_


#define _SCROLL_COUNT 1
#define ROWS_A 21
#define START_ROW_A 93
#define END_ROW_A 113
#define COLS_A 20
#define START_COL_A 0
#define END_COL_A 19


s16 _hScroll[] = {
  // rotation values for angle 2.000000 starts at 0
0, 0, 0, 0, 0, 0, 0, 0, 0, 0, 0, 0, 0, 0, 0, 0, 0, 0, 0, 0, 0};


s16 _vScroll[] = {
 // rotation values for angle 2.000000 starts at 0
-5, -4, -4, -3, -3, -2, -2, -1, -1, 0, 1, 1, 2, 2, 3, 3, 4, 4, 5, 6
};


#endif // _ROTATION_H_
_SCROLL_COUNT lets you know how many sets of offsets are in your file. In this case, it’s 1 as we only generated values for one angle (2 degrees). The #define rows can be used by your code when applying the scrolling offset arrays. * _hScroll[] is the set of horizontal scrolling offsets. *_vScroll[] is the set of vertical scrolling offsets.
“rotation.h” can be included directly in your source code. Depending on your project, you may want to define the scrolling arrays in .c file instead of a header. YMMV.
#include "rotation.h"You’ll want to make sure the scrolling mode is set to HSCROLL_LINE and VSCROLL_2TILE.
  // set scrolling mode to LINE for horizontal and TILE for vertical
  VDP_setScrollingMode(HSCROLL_LINE, VSCROLL_2TILE);
You tell SGDK to apply the scrolling values with VDP_setHorizontalScrollLine() and VDP_setVerticalScrollTile()
  VDP_setHorizontalScrollLine(BG_A, START_ROW_A, _hScroll, ROWS_A, CPU);
  VDP_setVerticalScrollTile(BG_A, START_COL_A, _vScroll, COLS_A, CPU);
Rotate 2 Degrees Resource and Source Files
Project files can be found at GitHub
resources.res
IMAGE platform "bg/platform.png" NONE
PALETTE platform_pal "bg/platform.png"
main.c
#include <genesis.h>
#include "resources.h"
#include "rotation.h"

/////////////////////////////////////////////////////////////////////
// Scrolling Stuff
#define PLANE_MAX_TILE 64

int main(bool hard)
{
  VDP_setScreenWidth320();
  // set colors
  PAL_setPalette( PAL0, platform_pal.data, CPU );

  // set scrolling mode to LINE for horizontal and TILE for vertical
  VDP_setScrollingMode(HSCROLL_LINE, VSCROLL_2TILE);

  // get tile positions in VRAM.
  int ind = TILE_USER_INDEX;
  int indexA = ind;
  // Load the plane tiles into VRAM
  VDP_loadTileSet(platform.tileset, ind, DMA);

  // setup the tiles
  VDP_setTileMapEx(BG_A, platform.tilemap, TILE_ATTR_FULL(PAL0, TRUE, FALSE, FALSE, indexA),
                   0,               // Plane X destination
                   0,               // plane Y destination
                   0,               // Region X start position
                   0,               // Region Y start position
                   PLANE_MAX_TILE, // width  (went with 64 becasue default width is 64.  Viewable screen is 40)
                   28,             // height
                   CPU);

  // set SGDK scrolling functions to fake the rotaiton.
  VDP_setHorizontalScrollLine(BG_A, START_ROW_A, _hScroll, ROWS_A, CPU);
  VDP_setVerticalScrollTile(BG_A, START_COL_A, _vScroll, COLS_A, CPU);

  while (TRUE)
  {
    // let SGDK do its thing
    SYS_doVBlankProcess();
  }
  return 0;
}
Build the project with
%GDK%\bin\make -f %GDK%\makefile.genand get an image that looks like: 
The start/stop rows and columns will vary with your application. You’ll need to adjust rows and columns to fit your image and the amount you want to rotate it. If you have too few rows, the rotation effect will stop too soon. 5 degrees with --row_start 93 --row_end 113 looks like this: 
Increasing the number of computed rows lets you use larger rotations. 5 degrees using --row_start 63 --row_end 143 looks like this:  -15 degrees
And 15 degrees looks like this. 
Note the green pixels on the left portion of the display. You can around this by using a wider image for the rotating background. The actual width of your background image depends on what your doing.
Generate a Range of Rotations.
It’s a waste of memory and CPU to do a single rotation on a image. You’d be better off creating the background image pre-rotated. In this example, I want to rotate the image from -5 degrees to 5 degrees in increments of 1 degree. To do this, I used the following values for the angles:
--start_angle -5
--end_angle 5
--angle_increment 1
The command and output looks something like this:
python3 sgdk_scroll_rotate.py --start_angle -5 --end_angle 5 --angle_increment 1  --center_x  9  --center_y 103   --row_start 73 --row_end 133
INFO: Parameters
INFO: Start angle: -5.000000 Stop angle: 5.000000 Step size: 1.000000
INFO: Columns to rotate: 20 Center column: 9
INFO: Rows to rotate: 61 Center row: 103
#define ROWS_A 61
#define START_ROW_A 73
#define END_ROW_A 133
#define COLS_A 20
#define START_COL_A 0
#define END_COL_A 19
and the rotation.h offset file now look like:
#ifndef _ROTATION_H_
#define _ROTATION_H_


#define _SCROLL_COUNT 11
#define ROWS_A 61
#define START_ROW_A 73
#define END_ROW_A 133
#define COLS_A 20
#define START_COL_A 0
#define END_COL_A 19


s16 _hScroll[] = {
  // rotation values for angle -5.000000 starts at 0
3, 3, 2, 2, 2, 2, 2, 2, 2, 2, 2, 2, 2, 1, 1, 1, 1, 1, 1, 1, 1, 1, 1, 1, 1, 0, 0, 0, 0, 0, 0, 0, 0, 0, 0, 0, -1, -1, -1, -1, -1, -1, -1, -1, -1, -1, -1, -1, -2, -2, -2, -2, -2, -2, -2, -2, -2, -2, -2, -3, -3
  // rotation values for angle -4.000000 starts at 61
, 2, 2, 2, 2, 2, 2, 2, 2, 2, 1, 1, 1, 1, 1, 1, 1, 1, 1, 1, 1, 1, 1, 1, 0, 0, 0, 0, 0, 0, 0, 0, 0, 0, 0, 0, 0, 0, 0, -1, -1, -1, -1, -1, -1, -1, -1, -1, -1, -1, -1, -1, -1, -2, -2, -2, -2, -2, -2, -2, -2, -2
  // rotation values for angle -3.000000 starts at 122
, 2, 2, 1, 1, 1, 1, 1, 1, 1, 1, 1, 1, 1, 1, 1, 1, 1, 1, 1, 1, 1, 0, 0, 0, 0, 0, 0, 0, 0, 0, 0, 0, 0, 0, 0, 0, 0, 0, 0, 0, -1, -1, -1, -1, -1, -1, -1, -1, -1, -1, -1, -1, -1, -1, -1, -1, -1, -1, -1, -2, -2
  // rotation values for angle -2.000000 starts at 183
, 1, 1, 1, 1, 1, 1, 1, 1, 1, 1, 1, 1, 1, 1, 1, 1, 0, 0, 0, 0, 0, 0, 0, 0, 0, 0, 0, 0, 0, 0, 0, 0, 0, 0, 0, 0, 0, 0, 0, 0, 0, 0, 0, 0, 0, -1, -1, -1, -1, -1, -1, -1, -1, -1, -1, -1, -1, -1, -1, -1, -1
  // rotation values for angle -1.000000 starts at 244
, 1, 1, 0, 0, 0, 0, 0, 0, 0, 0, 0, 0, 0, 0, 0, 0, 0, 0, 0, 0, 0, 0, 0, 0, 0, 0, 0, 0, 0, 0, 0, 0, 0, 0, 0, 0, 0, 0, 0, 0, 0, 0, 0, 0, 0, 0, 0, 0, 0, 0, 0, 0, 0, 0, 0, 0, 0, 0, 0, -1, -1
  // rotation values for angle 0.000000 starts at 305
, 0, 0, 0, 0, 0, 0, 0, 0, 0, 0, 0, 0, 0, 0, 0, 0, 0, 0, 0, 0, 0, 0, 0, 0, 0, 0, 0, 0, 0, 0, 0, 0, 0, 0, 0, 0, 0, 0, 0, 0, 0, 0, 0, 0, 0, 0, 0, 0, 0, 0, 0, 0, 0, 0, 0, 0, 0, 0, 0, 0, 0
  // rotation values for angle 1.000000 starts at 366
, -1, -1, 0, 0, 0, 0, 0, 0, 0, 0, 0, 0, 0, 0, 0, 0, 0, 0, 0, 0, 0, 0, 0, 0, 0, 0, 0, 0, 0, 0, 0, 0, 0, 0, 0, 0, 0, 0, 0, 0, 0, 0, 0, 0, 0, 0, 0, 0, 0, 0, 0, 0, 0, 0, 0, 0, 0, 0, 0, 1, 1
  // rotation values for angle 2.000000 starts at 427
, -1, -1, -1, -1, -1, -1, -1, -1, -1, -1, -1, -1, -1, -1, -1, -1, 0, 0, 0, 0, 0, 0, 0, 0, 0, 0, 0, 0, 0, 0, 0, 0, 0, 0, 0, 0, 0, 0, 0, 0, 0, 0, 0, 0, 0, 1, 1, 1, 1, 1, 1, 1, 1, 1, 1, 1, 1, 1, 1, 1, 1
  // rotation values for angle 3.000000 starts at 488
, -2, -2, -1, -1, -1, -1, -1, -1, -1, -1, -1, -1, -1, -1, -1, -1, -1, -1, -1, -1, -1, 0, 0, 0, 0, 0, 0, 0, 0, 0, 0, 0, 0, 0, 0, 0, 0, 0, 0, 0, 1, 1, 1, 1, 1, 1, 1, 1, 1, 1, 1, 1, 1, 1, 1, 1, 1, 1, 1, 2, 2
  // rotation values for angle 4.000000 starts at 549
, -2, -2, -2, -2, -2, -2, -2, -2, -2, -1, -1, -1, -1, -1, -1, -1, -1, -1, -1, -1, -1, -1, -1, 0, 0, 0, 0, 0, 0, 0, 0, 0, 0, 0, 0, 0, 0, 0, 1, 1, 1, 1, 1, 1, 1, 1, 1, 1, 1, 1, 1, 1, 2, 2, 2, 2, 2, 2, 2, 2, 2
  // rotation values for angle 5.000000 starts at 610
, -3, -3, -2, -2, -2, -2, -2, -2, -2, -2, -2, -2, -2, -1, -1, -1, -1, -1, -1, -1, -1, -1, -1, -1, -1, 0, 0, 0, 0, 0, 0, 0, 0, 0, 0, 0, 1, 1, 1, 1, 1, 1, 1, 1, 1, 1, 1, 1, 2, 2, 2, 2, 2, 2, 2, 2, 2, 2, 2, 3, 3};


s16 _vScroll[] = {
 // rotation values for angle -5.000000 starts at 0
13, 11, 10, 8, 7, 6, 4, 3, 1, 0, -1, -3, -4, -6, -7, -8, -10, -11, -13, -14
 // rotation values for angle -4.000000 starts at 20
, 10, 9, 8, 7, 6, 4, 3, 2, 1, 0, -1, -2, -3, -4, -6, -7, -8, -9, -10, -11
 // rotation values for angle -3.000000 starts at 40
, 8, 7, 6, 5, 4, 3, 3, 2, 1, 0, -1, -2, -3, -3, -4, -5, -6, -7, -8, -8
 // rotation values for angle -2.000000 starts at 60
, 5, 4, 4, 3, 3, 2, 2, 1, 1, 0, -1, -1, -2, -2, -3, -3, -4, -4, -5, -6
 // rotation values for angle -1.000000 starts at 80
, 3, 2, 2, 2, 1, 1, 1, 1, 0, 0, 0, -1, -1, -1, -1, -2, -2, -2, -3, -3
 // rotation values for angle 0.000000 starts at 100
, 0, 0, 0, 0, 0, 0, 0, 0, 0, 0, 0, 0, 0, 0, 0, 0, 0, 0, 0, 0
 // rotation values for angle 1.000000 starts at 120
, -3, -2, -2, -2, -1, -1, -1, -1, 0, 0, 0, 1, 1, 1, 1, 2, 2, 2, 3, 3
 // rotation values for angle 2.000000 starts at 140
, -5, -4, -4, -3, -3, -2, -2, -1, -1, 0, 1, 1, 2, 2, 3, 3, 4, 4, 5, 6
 // rotation values for angle 3.000000 starts at 160
, -8, -7, -6, -5, -4, -3, -3, -2, -1, 0, 1, 2, 3, 3, 4, 5, 6, 7, 8, 8
 // rotation values for angle 4.000000 starts at 180
, -10, -9, -8, -7, -6, -4, -3, -2, -1, 0, 1, 2, 3, 4, 6, 7, 8, 9, 10, 11
 // rotation values for angle 5.000000 starts at 200
, -13, -11, -10, -8, -7, -6, -4, -3, -1, 0, 1, 3, 4, 6, 7, 8, 10, 11, 13, 14
};


#endif // _ROTATION_H_
It’s a much larger file now because it’s calculating 11 different sets of scrolling values. To help keep track of the data in the arrays _hScroll and _vScroll have comments that indicate where each set of angles begins.
Each set of offsets for _hScroll uses an array element for reach row to be scrolled. In this example ROWS_A is defined as 61.
`#define ROWS_A 61`The comments for _hScroll show the starting position for each angle: -5.0 degrees at 0, -4.0 degrees at 61, -3.0 degrees at 122, etc.
s16 _hScroll[] = {
  // rotation values for angle -5.000000 starts at 0
...
  // rotation values for angle -4.000000 starts at 61
...
  // rotation values for angle -3.000000 starts at 122

...
_vScroll uses an array element for for each column in the set. COLS_A for this example is defined as 20
#define COLS_A 20The comments for _vScroll show the starting position for each angle: -5.0 degrees at 0, -4.0 degrees at 20, -3.0 degrees at 40, etc.
s16 _vScroll[] = {
 // rotation values for angle -5.000000 starts at 0
13, 11, 10, 8, 7, 6, 4, 3, 1, 0, -1, -3, -4, -6, -7, -8, -10, -11, -13, -14
 // rotation values for angle -4.000000 starts at 20
, 10, 9, 8, 7, 6, 4, 3, 2, 1, 0, -1, -2, -3, -4, -6, -7, -8, -9, -10, -11
 // rotation values for angle -3.000000 starts at 40
, 8, 7, 6, 5, 4, 3, 3, 2, 1, 0, -1, -2, -3, -3, -4, -5, -6, -7, -8, -8

...
You can quickly rotate a background by copying the right position of the array to SGDK’s scrolling functions.
If we want to rotate by -5 degreees, it’s the set of the array, So we just need to copy scroll values from the start of the arrays. It could be done with code like this:
    // Copy first set of angle offsets to local arrays
    memcpy(hScrollA, _hScroll, ROWS_A*sizeof(s16));
    memcpy(vScrollA, _vScroll, COLS_A*sizeof(s16));

    // set SGDK scrolling functions with local arrays to fake the rotaiton.
    VDP_setHorizontalScrollLine(BG_A, START_ROW_A, hScrollA, ROWS_A, CPU);
    VDP_setVerticalScrollTile(BG_A, START_COL_A, vScrollA, COLS_A, CPU);
If you want the rotation to be 0 degrees, use position 305 of _hScroll.
// rotation values for angle 0.000000 starts at 305and position 100 of _vScroll.
// rotation values for angle 0.000000 starts at 100So you could set the scrolling lines and tiles with code like this:
    // Copy sixth set of angle offsets to local arrays
    memcpy(hScrollA, _hScroll + 305, ROWS_A*sizeof(s16));
    memcpy(vScrollA, _vScroll + 100, COLS_A*sizeof(s16));

    // set SGDK scrolling functions with local arrays to fake the rotaiton.
    VDP_setHorizontalScrollLine(BG_A, START_ROW_A, hScrollA, ROWS_A, CPU);
    VDP_setVerticalScrollTile(BG_A, START_COL_A, vScrollA, COLS_A, CPU);
Of course, using hard-coded offsets is not very flexible. A better way to use the scrolling arrays is to keep track of the current angle index in a variable and add it to _hScroll and _vScroll whenever you want to change the rotation.
    // Copy current angle offsets into local arrays
    memcpy(hScrollA, _hScroll + currAngle * ROWS_A, ROWS_A*sizeof(s16));
    memcpy(vScrollA, _vScroll + currAngle * COLS_A, COLS_A*sizeof(s16));
To rock the image back and forth though the entire range of scroll values you just need to move currAngle from 0 to 10 and from 10 to 0.
  s16 currAngle = 5;  // start at angle 0
  s16 stepDir = 1;    // increase the angle
  u8 angleDelay = 0;
  while (TRUE)
  {
    // handle rotation
    ++angleDelay;
    if (angleDelay % 6 == 0)
    {
      currAngle += stepDir;
      if (currAngle >= _SCROLL_COUNT)
      {
        stepDir = -1;
        currAngle = 10;
      }
      else if (currAngle < 0)
      {
        stepDir = 1;
        currAngle = 0;
      }

      // Copy current angle offsets into local arrays
      memcpy(hScrollA, _hScroll + currAngle * ROWS_A, ROWS_A * sizeof(s16));
      memcpy(vScrollA, _vScroll + currAngle * COLS_A, COLS_A * sizeof(s16));
    }

    // set SGDK scrolling functions with local arrays to fake the rotation.
    VDP_setHorizontalScrollLine(BG_A, START_ROW_A, hScrollA, ROWS_A, CPU);
    VDP_setVerticalScrollTile(BG_A, START_COL_A, vScrollA, COLS_A, CPU);

    // let SGDK do its thing
    SYS_doVBlankProcess();
  }
Generate a Range of Rotations Resource and Source Files
Project files can be found at GitHub
resources.res
IMAGE platform "bg/platform.png" NONE
PALETTE platform_pal "bg/platform.png"
main.c
#include <genesis.h>
#include "resources.h"
#include "rotation.h"

/////////////////////////////////////////////////////////////////////
// Scrolling Stuff
#define PLANE_MAX_TILE 64

s16 hScrollA[224];
s16 vScrollA[20];


int main(bool hard)
{
  memset(hScrollA, 0, sizeof(hScrollA));
  memset(vScrollA, 0, sizeof(vScrollA));
  VDP_setScreenWidth320();
  // set colors
  PAL_setPalette( PAL0, platform_pal.data, CPU );

  // set scrolling mode to LINE for horizontal and TILE for vertical
  VDP_setScrollingMode(HSCROLL_LINE, VSCROLL_2TILE);

  // get tile positions in VRAM.
  int ind = TILE_USER_INDEX;
  int indexA = ind;
  // Load the plane tiles into VRAM
  VDP_loadTileSet(platform.tileset, ind, DMA);

  // setup the tiles
  VDP_setTileMapEx(BG_A, platform.tilemap, TILE_ATTR_FULL(PAL0, TRUE, FALSE, FALSE, indexA),
                   0,               // Plane X destination
                   0,               // plane Y destination
                   0,               // Region X start position
                   0,               // Region Y start position
                   PLANE_MAX_TILE, // width  (went with 64 becasue default width is 64.  Viewable screen is 40)
                   28,             // height
                   CPU);

  s16 currAngle = 5;
  s16 stepDir = 1;
  u8 angleDelay = 0;
  while (TRUE)
  {
    // handle rotation
    ++angleDelay;
    if (angleDelay % 6 == 0)
    {
      currAngle += stepDir;
      if (currAngle >= _SCROLL_COUNT)
      {
        stepDir = -1;
        currAngle = 10;
      }
      else if (currAngle < 0)
      {
        stepDir = 1;
        currAngle = 0;
      }

      // Copy current angle offsets into local arrays
      memcpy(hScrollA, _hScroll + currAngle * ROWS_A, ROWS_A * sizeof(s16));
      memcpy(vScrollA, _vScroll + currAngle * COLS_A, COLS_A * sizeof(s16));
    }

    // set SGDK scrolling functions with local arrays to fake the rotation.
    VDP_setHorizontalScrollLine(BG_A, START_ROW_A, hScrollA, ROWS_A, CPU);
    VDP_setVerticalScrollTile(BG_A, START_COL_A, vScrollA, COLS_A, CPU);

    // let SGDK do its thing
    SYS_doVBlankProcess();
  }
  return 0;
}
- the (angleDelay %6 == 0) just slows down the rate of changin
currAngle - still getting scrolling artifacts on the left. A simple way around this is to use a wider image (nextexample)
- Rotating around a fixed point may work in some cases, but you might want a more dynamic background
Rotation and Translation
The above example rotates a background image, but what if you want to move the background while its rotating? If we pass the array values directly to SGDK’s scrolling functions, the rotation will always be around the origin we specified to the script. We could have the script calculate rotations at different positions on the screen, but I think this would get very large, very quickly.
Instead of precalculating every possibility, I’ll handle scrolling translation at runtime. We can add or subtract from the _hScroll values to move the background left and right. We can also add or subtract from the _vScroll values to move up and down. The code could use something like this:
    for(int i=0; i < ROWS_A; ++i ) {
      hScrollA[ i ] = ship_hScroll[ currAngle * ROWS_A + i] + xOffset;
    }
    for (int i = 0; i < COLS_A; ++i)
    {
      vScrollA[i] = ship_vScroll[currAngle * COLS_A + i] + yOffset;
    }
This will be slower than a straight memcpy() call, but faster than calculating everything at runtime.
The code is not very different from the previous example. The main difference are 1. I’ve added some variables to keep track of the current translation offsets.
  s16 xOffset = 0;
  s16 yOffset = 0;
  s16 yOffsetDir = 1;
u8 offsetDelay = 0;- The main loop has some code to move the image up and down by setting
yOffsetto values from 0 to 40. It also moves the image left and right by incrementing or decrementingxOffsetby 1 pixel based on the value ofcurrAngle
    ++offsetDelay;
    if( offsetDelay % 3 == 0 ) {
      yOffset += yOffsetDir;
      if( yOffset > 40) {
        yOffsetDir = -1;
      }else if( yOffset < 0 ) {
        yOffsetDir = 1;
      }
      if( currAngle < 4) {
        xOffset+=1;
      } else if ( currAngle > 6) {
        xOffset-=1;
      }
}- Instead of using
memcpy()to set the angle offsets, it loops through the relevant_hScrolland_vScrollvalues and addsxOffsetoryOffset.
    for(int i=0; i < ROWS_A; ++i ) {
      hScrollA[ i ] = _hScroll[ currAngle * ROWS_A + i] + xOffset;
    }
    for (int i = 0; i < COLS_A; ++i)
    {
      vScrollA[i] = _vScroll[currAngle * COLS_A + i] + yOffset;
}- It does a sanity check on the current value of
yOffsetbefore setting the current horizontal scroll values.
    s16 startHorizontalScroll = START_ROW_A - yOffset;
    s16 totalRows = ROWS_A ;
    if( startHorizontalScroll < 0 ) {
      totalRows = ROWS_A + startHorizontalScroll;
      startHorizontalScroll = 0;
    }
    VDP_setHorizontalScrollLine(BG_A, startHorizontalScroll, hScrollA, totalRows, DMA);
This is done to make sure we don’t start the horizontal scroll at a negative row.
Rotation and Translation with Anchor Points
Rotating the background image is a nice effect, but in a game you may want to move a sprite or collision box along with the background. The script can rotate a set of user definied points along with the background. This final example will use a demonstrate using a point file with sprites. It also uses a different set of images (included in this repository) and create a project folder for you
If you run the script in the RotatePy directory with these parameters:
python3 sgdk_scroll_rotate.py -s -10 -e 10 -i 2 -r 60 -R 180 -y 112 -x 9 -w 384 -t points.csv -p anchor_pointsIt will create a project file at the location specified by the -p parameter. In this case target_points_ex
-p anchor_pointsThe ‘anchor_points’ project will contain copies of rotations.h, resources.res, main.c, and the default images.
The new image has a resolution of 384 x 224, so I specify the width with the -w parameter
-w 384 The script is expecting a CSV file named points.csv
-t points.csvThis file specifies a set of points on the backtround image that you want rotated around the origin.
name,x,y
lgun,106,130
rgun,277,130
lvent,176,127
rvent,207,127- The
namecolumn is a name for the point. Make sure the names are unique. They will be used to identify the points in therotations.handmain.cfiles. - The
xandycolums are the location of the point in the image.
The rotation.h file now has eight new arrays. Two for each point specified in points.csv. These arrays contain the x and y locations of the points.
s16 lgunX[] = {
 72,
 72,
 73,
 73,
 73,
 74,
 75,
 75,
 76,
 77,
 78
};

s16 rgunX[] = {
 240,
 242,
 243,
 243,
 244,
 245,
 246,
 246,
 246,
 247,
 247
};

s16 lventX[] = {
 141,
 142,
 142,
 143,
 143,
 144,
 145,
 145,
 146,
 146,
 147
};

s16 rventX[] = {
 172,
 173,
 173,
 174,
 174,
 175,
 176,
 176,
 176,
 177,
 177
};

s16 lgunY[] = {
 118,
 120,
 123,
 125,
 128,
 130,
 132,
 135,
 137,
 140,
 142
};

s16 rgunY[] = {
 147,
 144,
 140,
 137,
 134,
 130,
 126,
 123,
 119,
 116,
 112
};

s16 lventY[] = {
 127,
 127,
 127,
 127,
 127,
 127,
 127,
 127,
 127,
 127,
 127
};

s16 rventY[] = {
 132,
 131,
 130,
 129,
 128,
 127,
 126,
 125,
 124,
 123,
 121
};
You can lookup point locations at runtime with the current rotation angle index
    lgun_pos_x = lgunX[currAngle]-8 + xOffset;
    lgun_pos_y = lgunY[currAngle]-8 - yOffset;
    SPR_setPosition(lgun_sprite, lgun_pos_x, lgun_pos_y);

    rgun_pos_x = rgunX[currAngle]-8 + xOffset;
    rgun_pos_y = rgunY[currAngle ]-8 - yOffset;
    SPR_setPosition(rgun_sprite, rgun_pos_x, rgun_pos_y);

    lvent_pos_x = lventX[currAngle]-8 + xOffset;
    lvent_pos_y = lventY[currAngle]-8 - yOffset;
    SPR_setPosition(lvent_sprite, lvent_pos_x, lvent_pos_y);

    rvent_pos_x = rventX[currAngle]-8 + xOffset;
    rvent_pos_y = rventY[currAngle]-8 - yOffset;
    SPR_setPosition(rvent_sprite, rvent_pos_x, rvent_pos_y);
This is similar to looking up the rotation offsets with currAngle * ROWS_A and currAngle * COLS_A.
hScrollA[ i ] = _hScroll[ currAngle * ROWS_A + i] + xOffset;


